The Vase That Broke (Literally): Building a Touch-Sensitive Volume Control (Part 1)
Remember that sleek ceramic vase you thought would hold flowers for eternity? Yeah, well, mine ended up in pieces on my home office/workshop floor. But sometimes, the best lessons come from spectacular failures, and this little disaster taught me everything about the gap between theory and practice in tangible interface design.
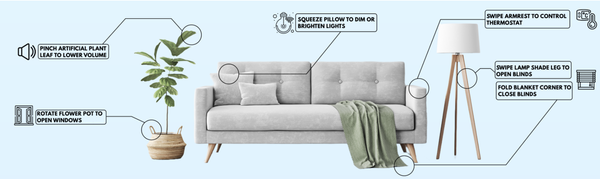
The Vision: An iPod Click Wheel, But Make It Ceramic
The idea seemed brilliant in my head: take a beautiful ceramic vase and turn it into a touch-sensitive volume control for my wireless speakers. The design was inspired by the iPod Classic's click wheel (remember that, you fossils?). Users would slide a finger clockwise to raise the volume or counterclockwise to lower it. It felt intuitive, elegant, and, well... discreet.
What could go wrong?
Attempt #1: The Ceramic Catastrophe
My original plan was delightfully naive. I'd simply:
- Etch conductive channels directly onto the ceramic surface
- Drill strategic holes for wire routing
- House all electronics in a false bottom
- Profit (academically speaking)
The implementation brought several challenges. First, the delicate ceramic material needed to be preserved without cracking or weakening it. Next came the task of discreetly embedding electronic components while keeping the surface completely invisible and responsive to touch. Finally, the vase had to retain its original appearance and allow for interaction from either side.
I chose the XIAO ESP32S3 microcontroller (a compact board with built-in WiFi, Bluetooth, and dedicated capacitive touch pins). It seemed like the perfect fit. Capacitive sensing appeared ideal too, no visible buttons, just smooth, touch-sensitive zones that could detect finger contact through the ceramic.
But this was where reality clashed with my academic optimism.
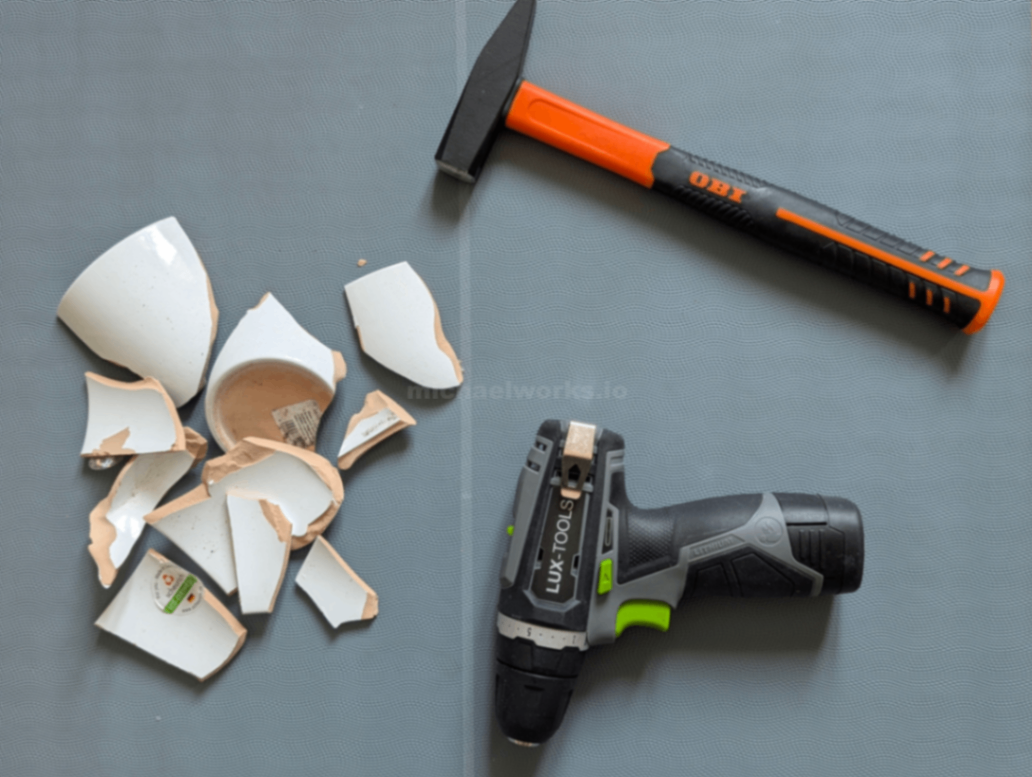
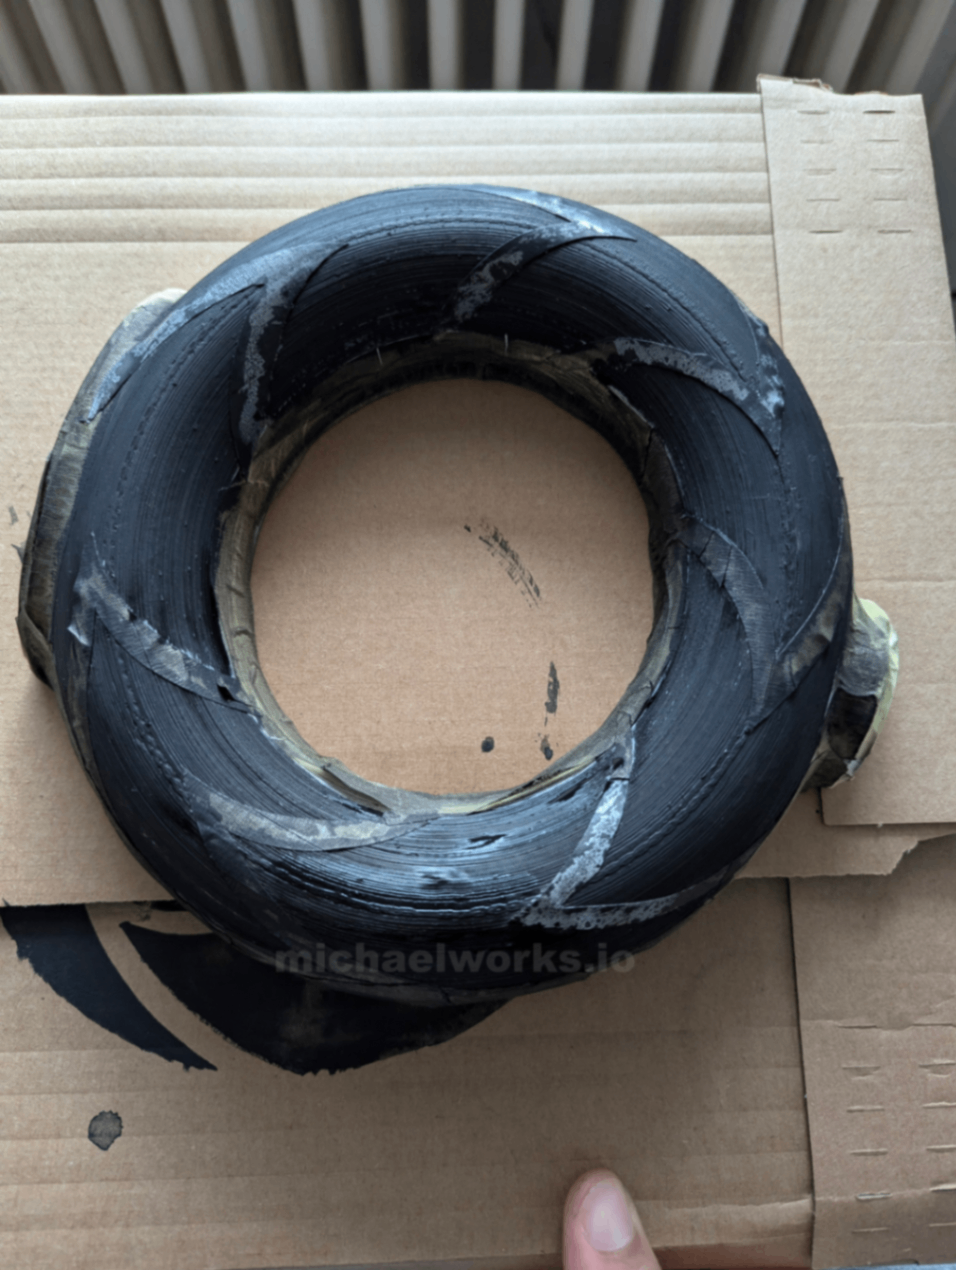
The Great Ceramic Crack of 2023
Everything was going smoothly until I tried to drill 1.5mm holes for wire routing. Despite taking precautions during the drilling process, the ceramic vase fractured while drilling. I had to redesign the implementation approach completely.
The sound of ceramic cracking is surprisingly loud in a quiet workshop. It's also surprisingly final.
Standing there with ceramic shards and the remnants of my "brilliant" plan, I had two choices, give up or get creative. Spoiler alert, I got creative.
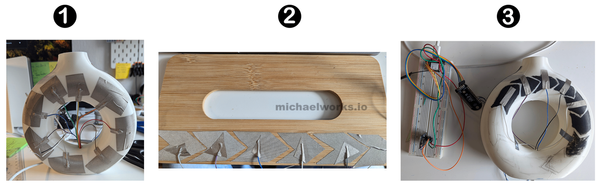
Enter 3D Printing
This is where modern fabrication tools become your best friend. I had the right mind to have a chat with a colleague who's an all-round genius when it comes to all things 3D printing and fabrication. He took one look at the vase and made a 3D model copy; cool, right?
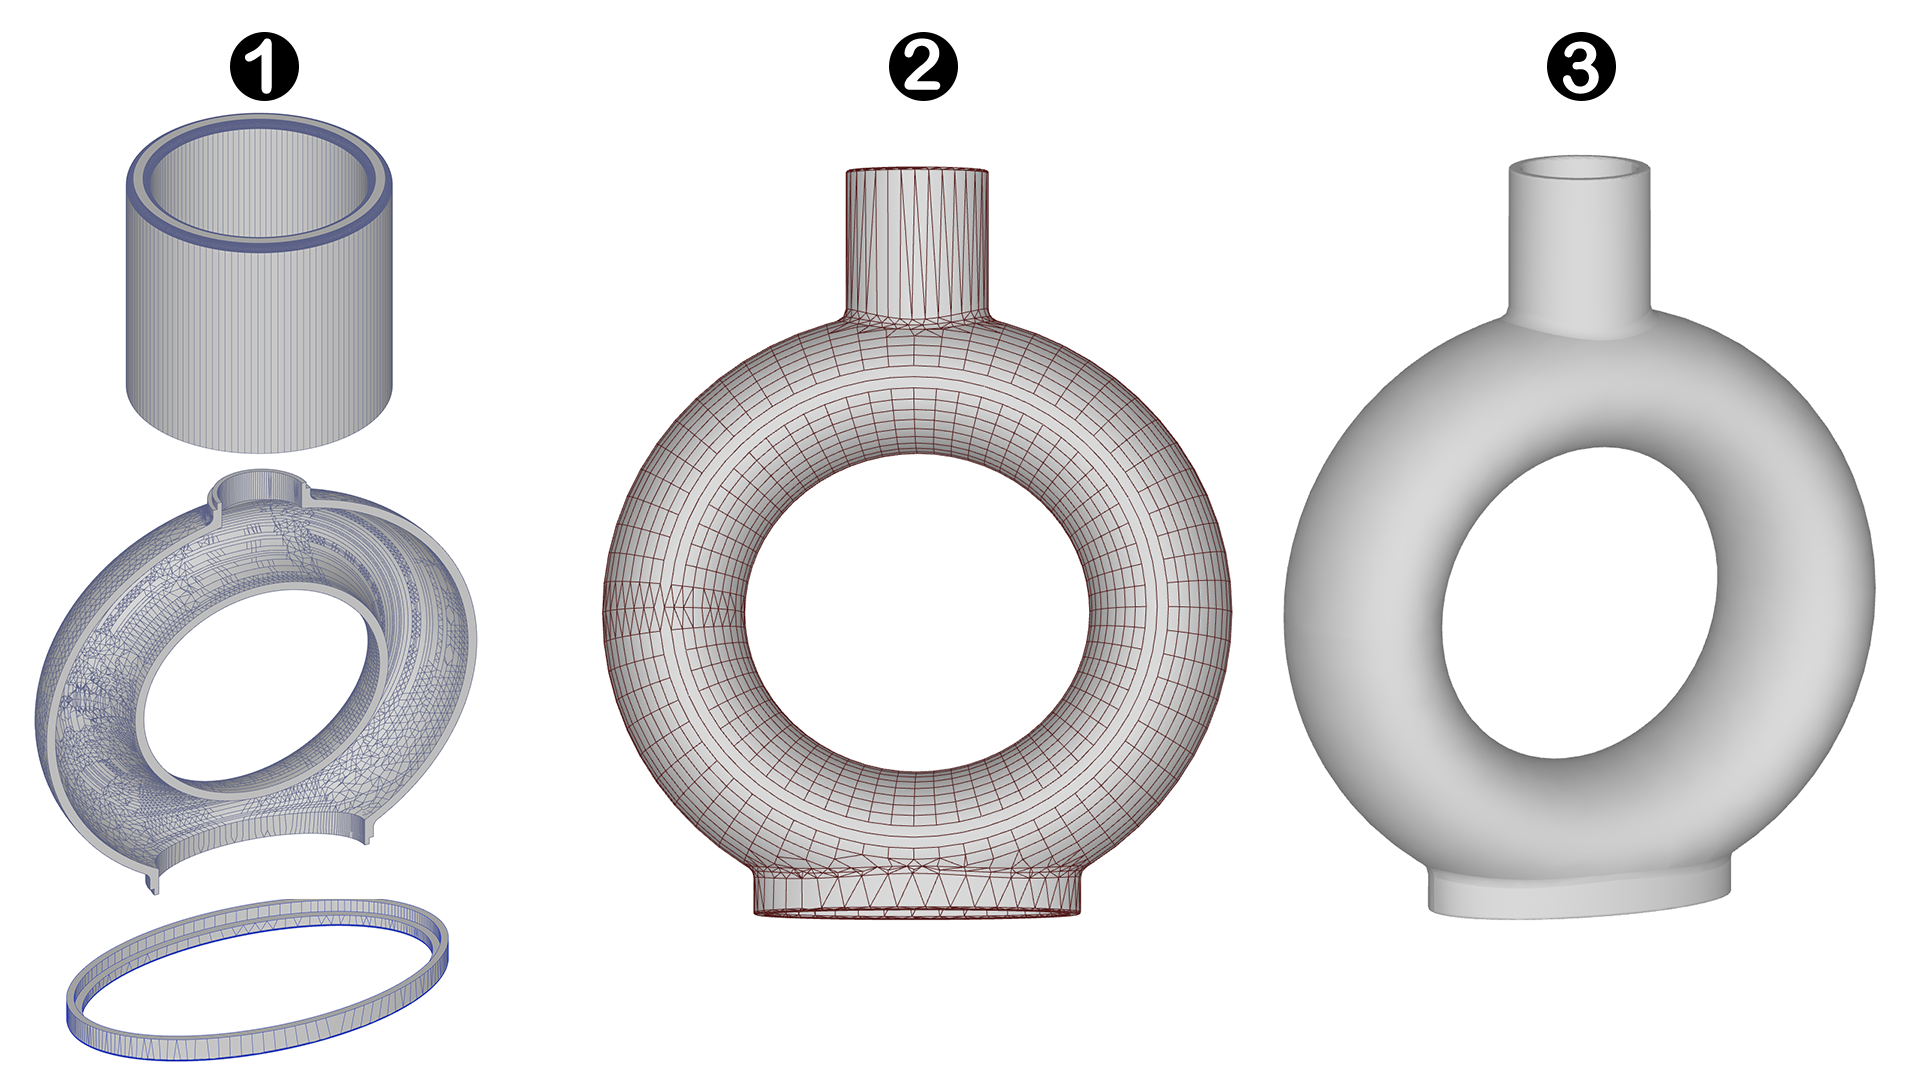
The redesigned vase had four printable components:
- Hollow base
- Neck section
- Two side sections
The modular approach wasn't just practical—it was essential. When you're embedding electronics in objects, you need access for debugging, repairs, and the inevitable "why isn't this working?" moments.
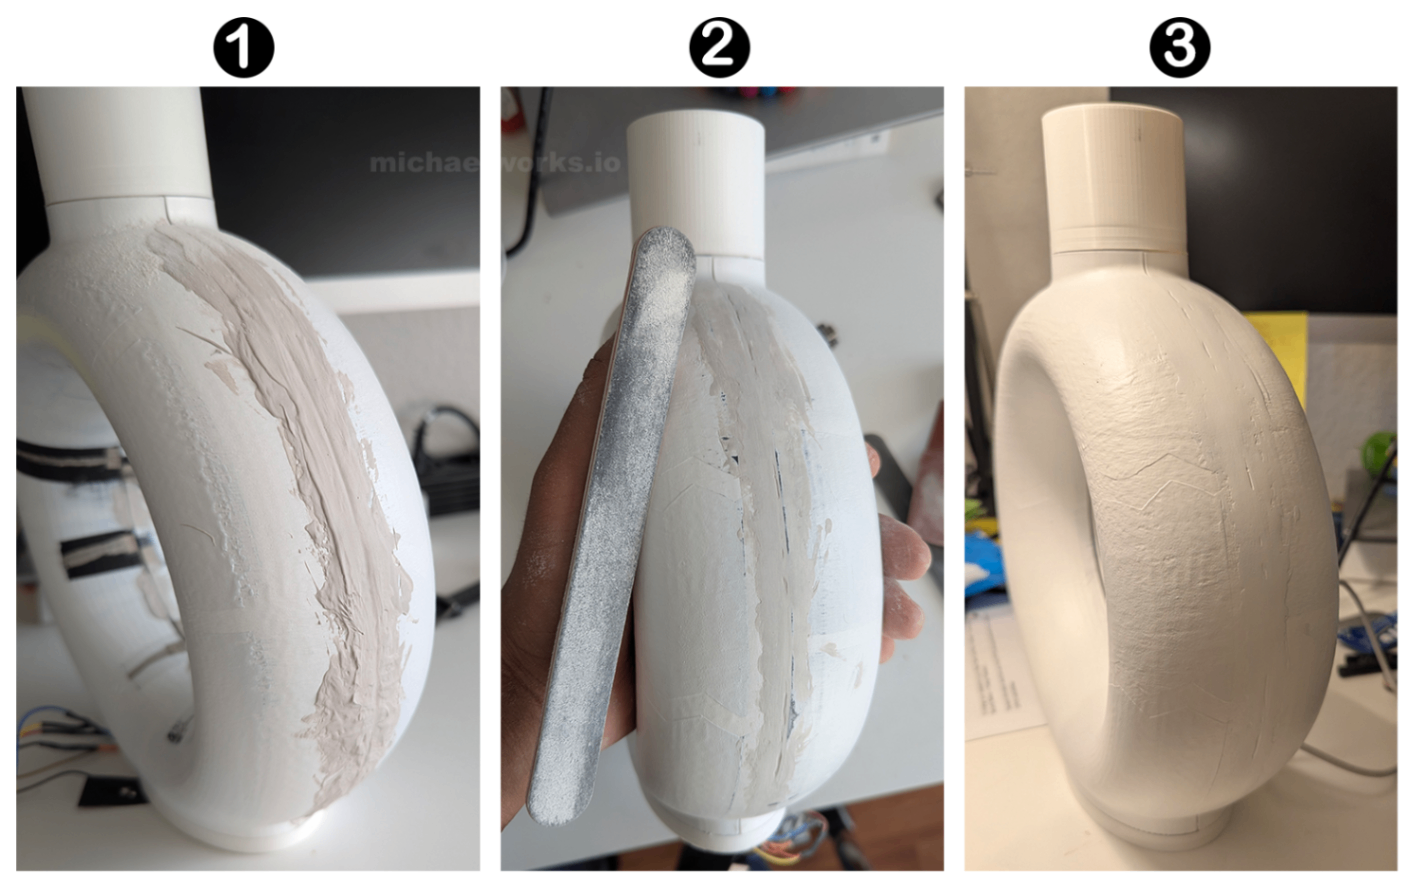
The Surface Preparation Marathon
Before I could think about conductive ink or touch sensors, I had to face the layer lines, a sometimes unavoidable result of 3d printing. These fine ridges might be acceptable on some prints, but they were a nightmare for my case, because I had to apply conductive ink. If left untreated, they can cause ink to flow unpredictably and even short adjacent touch channels.
This meant the surface had to be perfectly smooth. Enter Revell “Plasto” modelling putty, I have used this before to fill gaps in model planes (Yes, I have hobbies). The process was slow and messy, but it was essential.
1. Apply Plasto liberally: Like frosting a bumpy cake, the aim was to fill every groove with a smooth layer.
2. Let it cure: A full 24 hours to solidify. No shortcuts here.
3. Sand with escalating regret: Start with 60-grit to knock back the roughest areas, follow with 80-grit, and finish with 120-grit. Each round exposes the flaws of the last.
The same method was used on both the surface and the seams. It wasn’t just about aesthetics—it was to ensure even conductivity. One tiny bump could kill a touch zone, and trust me, debugging those is maddening.
Pro tip: wear a mask. Plasto dust gets everywhere. My workspace looked like it snowed plastic filler.
The real test came with the fingertip pass. If I could feel anything with my eyes closed, it was back to sanding. The goal was a surface that felt like unglazed ceramic, not plastic. After days of sanding, curing, and more sanding, I finally had a surface smooth enough to carry current—and a false sense of confidence about what came next.
In the next post, I will get to the electronics and painting part. Bye for now!